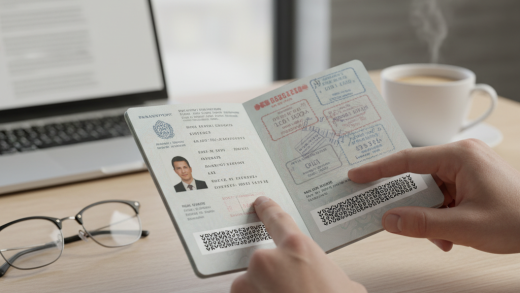
International travel involves navigating a complex web of immigration laws and border control procedures. One of the most critical yet often overlooked aspects of this process is the passport stamp. While many travelers view entry and exit stamps merely as souvenirs of their journeys, they hold significant legal weight. These ink marks serve as the official record of your presence in a foreign country, dictating how long you can stay, your visa classification, and when you must leave.
Misinterpreting the dates or codes on an entry stamp can lead to accidental overstays, heavy fines, deportation, or even a ban from re-entering the country. In an era where digital systems are becoming prevalent, physical stamps still act as the primary reference for travelers to track their legal status while abroad. This guide will walk you through the essential steps to understanding these stamps, ensuring you remain compliant with local immigration laws.
Prerequisites for Verifying Stamps
Before attempting to decode your immigration status, ensure you have the following:
- A Valid Passport: The physical document containing the stamps.
- Supporting Visa Documents: If you traveled on a specific visa (e.g., student, work, or tourist), have the original paperwork handy for cross-referencing.
- A Calendar: To accurately calculate your duration of stay based on the dates provided.
- Good Lighting or a Magnifying Glass: Immigration ink can sometimes be faint, smudged, or stamped over other text.
Step 1: Locate the Entry Stamp Immediately Upon Arrival
The moment you pass through immigration control, do not put your passport away immediately. Move to a safe area just past the booth and locate the fresh stamp. Immigration officers are human and can make mistakes, such as stamping the wrong date or forgetting to stamp altogether. Verifying the stamp immediately allows you to return to the officer to correct any errors before you leave the secure zone.
Step 2: Distinguish Between Date of Entry and ‘Admitted Until’ Date
This is the most common source of confusion for travelers. An entry stamp typically contains two dates or a duration:
- Date of Entry: The day you physically crossed the border.
- Admitted Until / Expiry Date: The specific date by which you must leave the country.
Crucial Note: Do not confuse your Visa Expiry Date (the last day you can use your visa to enter) with your Admitted Until Date (the length of time you are allowed to stay). Always follow the date handwritten or stamped by the officer on the entry stamp, as this overrides the general visa allowance.
Step 3: Decode the Visa Classification Codes
Most stamps include a code or abbreviation indicating your travel status. For example, in the United States, you might see ‘B1’ (Business) or ‘B2’ (Tourism). In the Schengen area, stamps indicate the mode of transport (plane, train, car). Understanding this classification is vital because it dictates what you are legally allowed to do. If you are stamped as a tourist but intend to attend business meetings, you must ensure your activities do not violate the terms of that specific entry code.
Step 4: Calculate Your Duration of Stay
If your stamp does not have a specific ‘Admitted Until’ date but instead says ’30 days’ or ’90 days’, you must calculate the exit date yourself. Count the day of arrival as Day 1. Many travelers make the mistake of starting the count the day after arrival, which can lead to a one-day overstay. Use a calendar to count exactly the number of days granted. If the stamp says ‘3 months’, this is different from ’90 days’; verify the specific immigration rule for that jurisdiction.
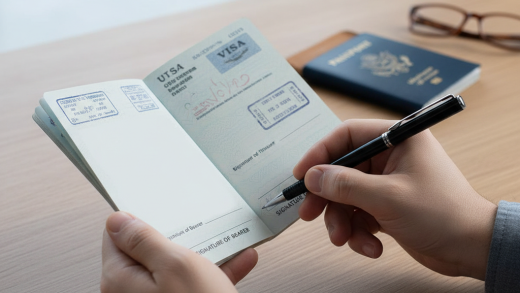
Step 5: Verify Exit Stamp Requirements
When leaving a country, you will usually receive an exit stamp. This serves as proof that you left within the legal timeframe. In some jurisdictions (like the Schengen Zone or the UK), exit checks are rigorous. Ensure the officer stamps your passport upon departure. If you leave through an automated gate (e-gate) and do not receive a physical stamp, keep your boarding pass and travel itinerary as secondary proof of your departure date in case of future disputes.
Step 6: Troubleshoot Smudged or Missing Stamps
If you discover later that a stamp is illegible or missing, do not panic, but take action. If you are still in the country, contact the nearest immigration office to rectify the record. If you have already left, retain all evidence of your travel (flight tickets, hotel receipts, credit card statements showing transactions in a different country) to prove you exited on time. This evidence may be required when you apply for a visa or enter that country again in the future.
Conclusion
Understanding entry and exit stamp rules is a fundamental responsibility of international travel. These ink marks are legally binding documents that define your rights within a foreign nation. By taking the time to verify the dates, understand the classification codes, and calculate your allowed duration of stay correctly, you protect yourself from legal complications. Always double-check your passport immediately after interacting with border control to ensure a smooth and stress-free journey.