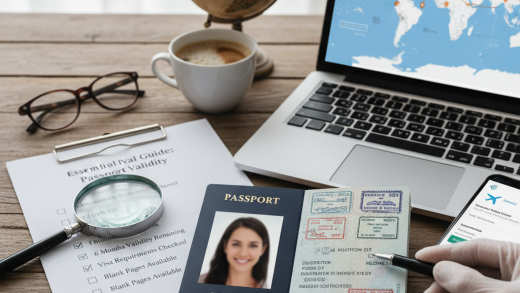
Getting a passport photo rejected is one of the most common reasons for delays in processing international travel documents. Whether you are applying for a United States passport, a Schengen visa, or a travel document for another region, the International Civil Aviation Organization (ICAO) has set strict biometric standards that must be met. A photo that looks ‘good enough’ to the human eye may fail automated facial recognition checks if it does not adhere to specific technical requirements.
1. Confirm the Size and Dimensions
The first step is knowing the exact dimensions required by the issuing country. While requirements can vary, there are two primary standards used globally:
- United States: Photos must be exactly 2 x 2 inches (51 x 51 mm). The head must be between 1 inch and 1 3/8 inches (25-35 mm) from the bottom of the chin to the top of the head.
- Europe/UK/Australia: Most other countries require a standard size of 35mm x 45mm.
Always check the official government website of the country you are applying to before printing or cutting your photos.
2. Prepare the Correct Background
The background of your photo is just as important as your face. Biometric software requires a high contrast between your features and the background.
- Color: The background must be plain white or off-white. Some countries allow light grey or light cream, but white is the safest option.
- Texture: It must be flat and free of patterns, objects, or textures.
- Shadows: There must be no shadows cast on the background behind you. To achieve this, stand a few feet away from the wall rather than right up against it.
3. Adhere to Dress Code and Accessory Rules
What you wear can disqualify your photo immediately. Follow these strict grooming guidelines:
- No Glasses: In the United States and many other jurisdictions, eyeglasses are no longer allowed in passport photos, even if you wear them daily. If you must wear them for medical reasons, a signed doctor’s statement is often required.
- No Uniforms: Do not wear camouflage or uniforms that look like military or law enforcement attire. Wear regular street clothes.
- Head Coverings: Hats and head coverings are generally prohibited unless worn for religious or medical purposes. If worn for religious reasons, the face must be fully visible from the hairline to the chin, and the covering must not cast shadows on the face.
- Jewelry: Small jewelry is usually acceptable if it does not hide facial features or reflect light into the camera lens.
4. Master the Pose and Facial Expression
Passport photos are not artistic portraits; they are for identification. The pose must be neutral and precise.
- Face Forward: Look directly into the camera. Your head should not be tilted, rotated, or leaning. Both ears should ideally be visible (or at least the head should be perfectly centered).
- Neutral Expression: Maintain a neutral facial expression with both eyes open and your mouth closed. Do not smile, frown, or show your teeth, as this distorts facial muscles used for biometric scanning.
- Eyes: Your eyes must be clearly visible. Ensure no hair falls across your eyes or eyebrows. Red-eye in the photo is grounds for rejection.
5. Ensure Lighting and Image Quality
Technical quality is the final hurdle. The photo must be a high-resolution color image.
- Lighting: Lighting should be even on both sides of the face to avoid shadows across the nose or in the eye sockets. Avoid overexposure (which washes out skin tones) or underexposure (which makes features indistinguishable).
- Resolution: The image must be sharp and in focus. Grainy, blurry, or pixelated photos will be rejected.
- No Filters: Do not use social media filters or retouching apps. Altering facial features, removing moles, or smoothing skin is strictly prohibited.
Conclusion
Taking a compliant passport photo requires attention to detail regarding lighting, background, and posing. By following these step-by-step requirements, you ensure that your application moves smoothly through the review process. Whether you choose a professional service or take the photo yourself at home, always double-check the image against the official government examples before submitting your application to avoid unnecessary travel delays.