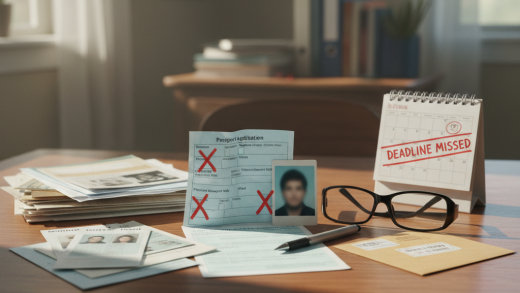

The Number One Culprit: Bad Photos
By a wide margin, the most common reason for a passport application to be put on hold is an unacceptable photograph. In the age of selfies and high-resolution smartphone cameras, it might seem easy to snap a picture at home, but the State Department’s biometric software is incredibly picky. If your photo does not meet specific technical requirements, your application will be suspended immediately.
One of the most frequent photo errors involves eyewear. As of recent years, glasses are not allowed in passport photos, even if you wear them daily. This rule was implemented to eliminate glare and ensure that biometric scanners can accurately map your facial features. If you submit a photo with glasses, your application will almost certainly be rejected.
Lighting and background are also critical factors. The background must be white or off-white, with no shadows. A common mistake in DIY photos is standing too close to a wall, which casts a shadow behind the head. Additionally, the lighting must be even across your face. Harsh shadows on the eyes or one side of the face will render the photo unusable.
Finally, pay attention to your expression and attire. You must face the camera directly with a neutral expression or a natural smile, and both eyes must be open. Do not wear uniforms or camouflage clothing. To avoid these headaches, it is highly recommended to have your photo taken at a professional facility, such as a pharmacy, post office, or shipping center, rather than attempting to print one at home.
The Paperwork: Ink, Typos, and Whiteout
When filling out the DS-11 (for new applicants) or DS-82 (for renewals), neatness counts. One of the most surprising reasons for rejection is the use of the wrong ink color. You must use black ink only. Blue ink, or any other color, can confuse the scanners used to digitize your application. If you fill out the form by hand, ensure you have a black pen ready before you start.
Another strict rule involves corrections. If you make a mistake—such as misspelling your middle name or writing the wrong digit in your social security number—do not use correction fluid (White-Out) or cross it out. Altered forms are considered invalid because the government cannot verify if the alteration was made by you or a third party. If you make a mistake, you must start over with a fresh form.
To minimize the risk of handwriting errors, consider using the State Department’s online form filler tool. This tool allows you to type your information into the form and then print it out. This ensures legibility and reduces the chance of misinterpreting a handwritten letter, which is a common cause of data entry errors during processing.
Documentation Disasters: Citizenship and Identity
Your passport application is essentially a request for the government to verify your citizenship and identity. Consequently, the supporting documents you provide must be flawless. A major stumbling block for many applicants involves birth certificates. You must submit an original or a certified copy of your birth certificate; a simple photocopy is not sufficient for proof of citizenship.
Furthermore, not all birth certificates are created equal. You must provide the “long-form” birth certificate that lists your parents’ full names. Some states issue short-form abstracts that look official but do not contain enough information for federal passport purposes. Before you apply, check your birth certificate to ensure it includes the registrar’s signature, a raised or multicolored seal, and the full names of your parents.
If you are submitting photocopies of your identification (like a driver’s license) to accompany the application, ensure you copy both the front and the back of the ID on a single side of a standard sheet of paper. Omitting the back of the license is a frequent administrative oversight that leads to delays.
The Name Game: Consistency is Key
Bureaucracy thrives on consistency. The name on your application must match the name on your proof of citizenship and your proof of identity. If your name has changed due to marriage or divorce, you cannot simply use your new name without providing the legal documentation to link the two identities.
If your current ID has your married name, but your birth certificate has your maiden name, you must submit the original or certified marriage certificate to bridge that gap. Failing to include name-change documentation is a surefire way to have your application paused while the agency mails you a letter requesting the missing proof.
Payment Pitfalls
Passport fees can be confusing because there are often two separate payments required: one to the U.S. Department of State and one to the acceptance facility (if applying in person). Mixing these up or combining them into one check is a common error.
For the application fee itself, personal checks or money orders are the standard. Credit cards are generally not accepted for the application fee when applying at a post office or library (though the facility may accept cards for their specific execution fee). Ensure the check is made out exactly to the “U.S. Department of State.” Abbreviations, typos, or illegible amounts on the check can result in the payment being rejected, which halts the entire process.
Additionally, verify the current fee amount right before you apply. Fees change periodically, and submitting a check for the old amount—even if it is off by a few dollars—will result in a rejection letter.
The Signature Trap
You must sign the application in the presence of the acceptance agent (a postal worker or clerk) so they can witness the signature and administer an oath. If you sign the form at home before heading to the post office, the form is void. You will have to fill out a completely new application on the spot, delaying your appointment and causing frustration.
Complications with Minors
Generally, both parents must appear in person with the child. If one parent cannot attend, they must provide a notarized Statement of Consent (Form DS-3053) along with a photocopy of the front and back of their ID. If you show up with just one parent and no notarized consent form, you will be turned away.
Furthermore, you must prove your relationship to the child. Even if the child has a previous passport, you must still submit the birth certificate with every new application to prove parentage. Many parents forget this step when renewing a child’s passport, assuming the old passport serves as sufficient proof of relationship.
Timing and Valid Dates
Procrastination is the enemy of travel documents. Processing times fluctuate wildly based on seasonal demand. What took four weeks in the winter might take twelve weeks in the spring. Applying too close to your travel date is a risky gamble. Always check the current processing times on the official government travel website before booking your trip.
Another timing issue relates to the “Six-Month Rule.” Many countries require your passport to be valid for at least six months beyond your planned date of departure. If your passport expires in four months, you may technically have a valid U.S. passport, but the airline might deny you boarding, or immigration officers may refuse entry upon arrival. Always renew your passport roughly nine months before it expires to remain safe.
Shipping and Tracking
Once you have successfully submitted your application, the waiting game begins. A common anxiety-inducing mistake is failing to pay for trackable shipping. When sending sensitive documents like original birth certificates via mail, you want the peace of mind that comes with a tracking number.
While the State Department will return your supporting documents (like that precious birth certificate) separately from your new passport, they are sent via standard mail unless you pay extra for 1-2 day delivery service. For many travelers, the small extra cost is worth it to ensure their vital records do not get lost in the shuffle.
What to Do If You Make a Mistake
If you realize you made a mistake after mailing your application, panic is a natural reaction, but it won’t help. In most cases, the State Department will mail you a letter explaining the error and requesting the missing information or a new photo. This letter will verify your case number and provide a specific address for your response.
Conclusion
Applying for a passport does not have to be a nightmare of red tape. By paying close attention to the details—specifically your photo, the ink color, the integrity of your forms, and your supporting documents—you can navigate the process smoothly. Treat the application with the same care you would a legal contract.
Double-check every line, verify every requirement, and apply well in advance of your travel dates. By avoiding these common mistakes, you ensure that the only thing you have to worry about is packing your bags and enjoying your journey.