
The passport renewal process has evolved significantly over the years. While it used to be a strictly paper-based ordeal requiring trips to the post office, modern systems have introduced more streamlined options. However, government procedures are strict, and even a minor error can lead to delays. This comprehensive guide will walk you through everything you need to know to renew your passport without the stress.
Step 1: Determine Your Eligibility for Renewal by Mail
Before you print any forms, you must determine if you are eligible to renew your passport by mail. This is the easiest and most convenient method, known as using Form DS-82 in the United States. If you qualify, you can skip the long lines at the acceptance facility.
Generally, you can renew by mail if your most recent passport is currently in your possession and is not damaged beyond normal wear and tear. Crucially, the passport must have been issued when you were age 16 or older. If you were a minor when your last passport was issued, you cannot renew by mail; you must apply in person as if it were a new application.
Additionally, the passport must have been issued within the last 15 years. If it has been longer than that, or if your name has changed and you cannot legally document the name change (such as with a marriage certificate or court order), you will be required to apply in person using Form DS-11.
Step 2: Understanding the ‘Six-Month Validity’ Rule
Many travelers check the expiration date and assume they are safe if their trip concludes before that date. However, this is a dangerous assumption. Many countries enforce a six-month validity rule. This means your passport must be valid for at least six months after your planned date of departure from that country.
If your passport expires in four months and you try to board a flight to a country with this rule, the airline will likely deny you boarding. Therefore, the best time to renew your passport is approximately nine months before it expires to ensure you never run into entry issues.
Step 3: Gather the Necessary Documents
Organization is the key to a seamless renewal. Start by locating your current passport book or card. You will need to mail this physical document in with your application. Don’t worry; it will be returned to you, usually in a separate mailing from your new passport, though it will be canceled with a hole punch to prevent future use.
If your current legal name differs from the name on your passport, you must provide a certified copy of the legal document specifying your name change. This could be a marriage certificate, a divorce decree, or a court-ordered name change document. Photocopies are generally not accepted; you need the original or a certified copy with a raised seal.
Step 4: The Perfect Passport Photo
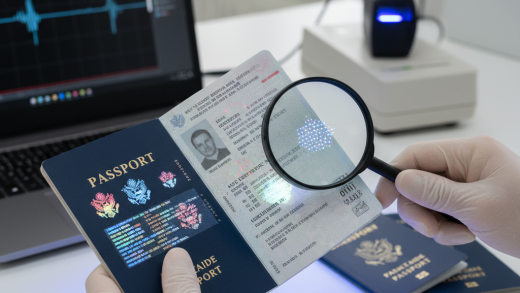
The number one reason for passport application delays is a rejected photograph. The State Department has incredibly specific requirements, and ‘close enough’ will not cut it. You need a color photo taken within the last six months that accurately represents your current appearance.
The photo must be 2×2 inches in size. The background must be plain white or off-white; busy backgrounds or shadows will result in a rejection. You must face the camera directly with a neutral expression or a natural smile, and both eyes must be open.
Crucial Tip: Do not wear glasses. Even if you wear them every day, you must take them off for the photo to avoid glare. Also, avoid wearing uniforms or camouflage clothing. If you can, go to a professional passport photo service at a pharmacy or shipping center to ensure the lighting and dimensions are exact.
Step 5: Completing Form DS-82
Once your documents and photo are ready, you need to fill out the application. You can download the PDF of Form DS-82 or use the online form filler tool provided by the government website. The online tool is highly recommended because it generates a barcode on the printed form that helps officials scan and process your application faster.
When filling out the form, ensure you use black ink if you are writing by hand. Write legibly and in block letters. Double-check your Social Security Number and ensure your mailing address is correct, as this is where your new travel document will be sent.
Step 6: Calculate and Pay the Fees
You generally cannot pay with a credit card for mail-in renewals. You must use a personal check, cashier’s check, or money order payable to the ‘U.S. Department of State.’ Do not send cash. On the memo line of the check, print your full name and your date of birth to ensure the payment is credited to the correct application.
Step 7: Mailing Your Application
Now that you have your form, your photo, your old passport, your name change documents (if applicable), and your check, it is time to mail the package. Do not use a standard envelope. Use a large envelope that allows the documents to fit without folding the form.
Staple your photo to the application in the designated square using four vertical staples, one in each corner. Be careful not to staple across your face in the image. Place your check and old passport in the envelope.
For the smoothest experience, use a trackable mailing service. Specifically, the State Department recommends using the United States Postal Service (USPS) with a traceable delivery method. Using a private courier like FedEx or UPS is generally not allowed for the standard PO Box addresses used for renewals unless you are using specific expedited courier services authorized by the government.
Processing Times: Routine vs. Expedited
Patience is a virtue when waiting for a passport. Routine processing can take anywhere from 6 to 9 weeks, depending on the seasonal demand. Demand usually spikes before summer and the winter holidays.
If you have travel plans coming up sooner, you should pay the extra fee for Expedited Service. This typically cuts the processing time down significantly, often to 3 to 5 weeks. For an additional fee, you can also pay for 1-2 day delivery for the return shipping of your new passport.
What If You Need It Immediately?
If you are traveling within 14 days and your passport is expired, the mail-in process will not work for you. You must make an appointment at a Regional Passport Agency. These are not post offices; they are specific government offices located in major cities.
To utilize this ‘Urgent Travel’ service, you must provide proof of international travel (such as a flight itinerary) departing within two weeks. Appointments are limited and can be difficult to secure, so checking the online appointment system early in the morning is often necessary.
The Online Renewal Option (Beta)
The government has been piloting an Online Passport Renewal (OPR) system. This allows eligible citizens to renew entirely online without mailing physical documents. This system opens for limited windows of time to control volume.
To use this, you must upload a digital photo and pay via credit card online. While this is the future of passport renewal and promises to be the most seamless method, availability is subject to change. Always check the official travel.state.gov website to see if the portal is currently accepting new applications.
Common Mistakes That Cause Delays
Even the most organized travelers make mistakes. The most common error is forgetting to sign the application. An unsigned form is immediately rejected and mailed back to you, resetting the processing clock.
Another frequent issue is sending the wrong payment amount. If the fee is incorrect, the application cannot be processed. Finally, bad photos—specifically those with poor lighting or shadows on the face—are a top cause of rejection. Taking the extra time to get these details right saves weeks of frustration.
What About Children’s Passports?
It is vital to note that the ‘seamless’ mail-in renewal process described here applies primarily to adults. Passports for children under 16 cannot be renewed by mail. Even if your child had a previous passport, you must apply in person with the child and both parents present, using Form DS-11.
Children’s passports are only valid for 5 years, unlike the 10-year validity for adults. Because children’s appearance changes rapidly, the government requires in-person verification for every renewal until they turn 16.
Tracking Your Application Status
Once you have mailed your application, the waiting game begins. You can track the status of your application online using the ‘U.S. Passport Application Status’ tool. Note that it may take up to two weeks after you mail your documents for the status to change to ‘In Process.’
You can also sign up for email updates via the status tool. This will notify you when the passport is mailed back to you, providing a tracking number so you can keep an eye on your mailbox.
Receiving Your New Passport
When your new passport arrives, open it immediately and check for errors. Ensure your name is spelled correctly and the birth date is accurate. While rare, printing errors do happen, and they must be corrected before you travel.
Your old passport (and any supporting documents like marriage certificates) will arrive separately. This often causes panic for applicants who receive one envelope but not the other. Be patient; the supporting documents usually arrive within a week or two of the new passport.
Conclusion
Renewing an expired passport doesn’t have to be a headache. By verifying your eligibility, taking a compliant photo, and carefully filling out Form DS-82, you can ensure a seamless experience. The world is waiting for you—don’t let paperwork stand in the way of your next great adventure. Start the process early, double-check your documents, and you’ll be ready for takeoff in no time.