
Instead, ‘activating’ your passport is a series of essential verification and preparation steps you must take to ensure it is valid and ready for international travel. This guide will walk you through every critical action, from the moment you open the envelope to the day you pack your bags, ensuring your journey begins smoothly and without any bureaucratic hurdles.
The Single Most Important Step: Sign Your Passport
An unsigned passport is technically an invalid travel document. A border control agent in another country could deny you entry, or an airline agent could prevent you from boarding your flight, if they notice it’s unsigned. This simple step legitimizes the document as belonging to you.
How and Where to Sign
Use a pen with black or blue ink. It’s best to use a non-ballpoint pen, like a fine-tipped permanent marker or a gel ink pen that doesn’t bleed, to ensure the signature is clear and won’t smudge over time. Sign your name as it typically appears on other official documents, like your driver’s license. The signature should fit neatly on the provided line.
What About Passports for Minors?
For children who are too young to sign their own name, a parent or legal guardian can sign for them. The standard practice is to print the child’s name on the signature line, followed by the parent’s signature, and then write ‘(mother)’ or ‘(father)’ in parentheses. For example: Jane Doe by John Doe (father). Check the specific guidance from your country’s passport issuing agency for the most current regulations.
Step 2: Meticulously Verify Your Personal Information
- Your full name (spelling and order)
- Date of birth
- Place of birth
- Sex
- The passport issuance and expiration dates
Also, ensure the photograph is clearly you and that the digital signature printed below your photo matches the one you provided. If you find any errors, no matter how small, you must contact the passport issuing agency immediately. A typo in your name or an incorrect birthdate can cause significant travel disruptions.
Step 3: Understand the Critical Six-Month Validity Rule
Your passport has an expiration date, but its usability for international travel often ends months before that date. Many countries enforce the ‘six-month validity rule,’ which means they will not allow a traveler to enter unless their passport is valid for at least six months after their planned departure date from that country.
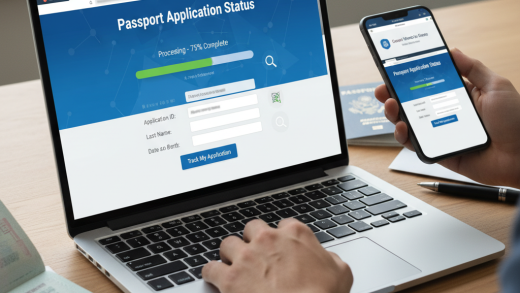
This rule prevents travelers from becoming stranded in a foreign country with an expired passport. Before you book any international flights or hotels, check your passport’s expiration date. If it’s within a year of expiring, it’s wise to start the renewal process, especially if you plan on frequent travel.
Step 4: Check for Sufficient Blank Visa Pages
Flip through your passport. Are there enough blank pages? Many countries require at least one or two completely blank pages for their entry and exit stamps, or for affixing a visa sticker. Pages marked ‘Amendments’ or ‘Endorsements’ at the back of the passport do not count.
If you are an avid traveler and your passport is filling up, you may need to renew it, even if it’s far from its expiration date. In the past, some countries offered services to add extra pages, but most, including the United States, have discontinued this practice and now require a full renewal for a new, larger book.
Step 5: Research Visa Requirements for Your Destination
A passport grants you the right to leave and re-enter your own country. It does not automatically grant you the right to enter any other country. Every nation sets its own entry rules, and you may need a visa to visit.
Before you travel, you must check the visa requirements for your destination based on your citizenship. The best source for this information is the official embassy or consulate website of the country you plan to visit. Do not rely on secondhand information, as visa rules can change frequently.
Failing to secure a necessary visa is one of the most common reasons travelers are denied boarding or turned away at their destination’s border. Allow ample time for the visa application process, which can take several weeks or even months.
Step 6: Make Physical and Digital Copies
Once your passport is signed and verified, your next step is to create backups. A lost or stolen passport can turn a dream vacation into a logistical nightmare. Mitigate this risk by preparing copies.
Make several high-quality color photocopies of your passport’s data page. Keep one copy in a separate piece of luggage from your actual passport, and leave another copy with a trusted friend or family member at home.
In addition to physical copies, create a digital backup. Take a clear photo of your data page with your smartphone. Save this image in a secure, password-protected cloud storage service (like Google Drive, Dropbox, or iCloud) or email it to yourself. This allows you to access your passport information from anywhere in the world with an internet connection, which can be invaluable when dealing with a lost passport situation at an embassy.
Step 7: Register Your Trip with Your Government
Many governments offer a travel registration service for their citizens. For Americans, this is the Smart Traveler Enrollment Program (STEP). By enrolling your trip details, you provide the local U.S. embassy or consulate with information about your whereabouts.
This registration allows the embassy to contact you in case of an emergency, such as a natural disaster, civil unrest, or a family emergency back home. They can also send you important travel alerts and advisories for your destination country. It’s a free, simple step that adds a significant layer of safety to your travels.
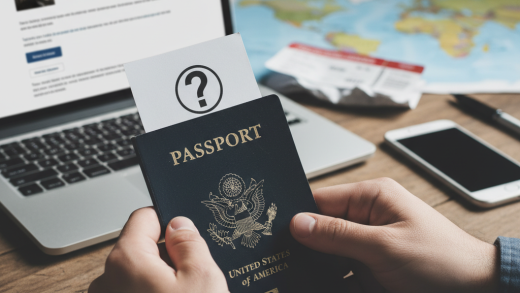
Step 8: Assess the Physical Condition of Your Passport
Your passport must be in good condition to be considered valid. Normal wear and tear is expected, but significant damage can invalidate it. What constitutes ‘damage’?
- Water damage: Significant discoloration, smudging of ink, or warping of pages.
- Tears or holes: Any major tear, especially on the data page.
- Unofficial markings: Any writing or stamps other than official ones from border control.
- Damaged chip: Issues with the electronic chip in biometric passports (often indicated by a symbol on the cover) can sometimes cause problems at automated border gates.
If you believe your passport is damaged, it is safer to apply for a replacement than to risk being denied travel. An airline has the right to refuse to board a passenger with a passport they deem too damaged to be valid.
Pre-Travel Passport Activation Checklist
- Sign It: Immediately sign your passport on the signature line with black or blue ink.
- Verify It: Double-check every detail on the data page for accuracy.
- Check the Date: Confirm your passport is valid for at least six months beyond your planned return date.
- Count the Pages: Ensure you have enough blank pages for stamps and visas.
- Research Visas: Check the entry requirements for your destination and apply for any necessary visas well in advance.
- Copy It: Make both physical and secure digital copies of your passport’s data page.
- Register Your Trip: Enroll your travel plans with your government’s traveler program (e.g., STEP for U.S. citizens).
- Inspect It: Check for any damage that could invalidate the document.